Lumber Rack

Well this project is long overdue and a week late after getting strep throat last week (never want that again). I basically used Marc Spagnuolo’s design and adjusted it to fit my needs. I have way more lumber right now than I would normally have in my shop because of all the wood I got in the craigslist deal. I figured by building this rack I could get a lot of my floor space back, and as most guys with small shops know, floor space is paramount.


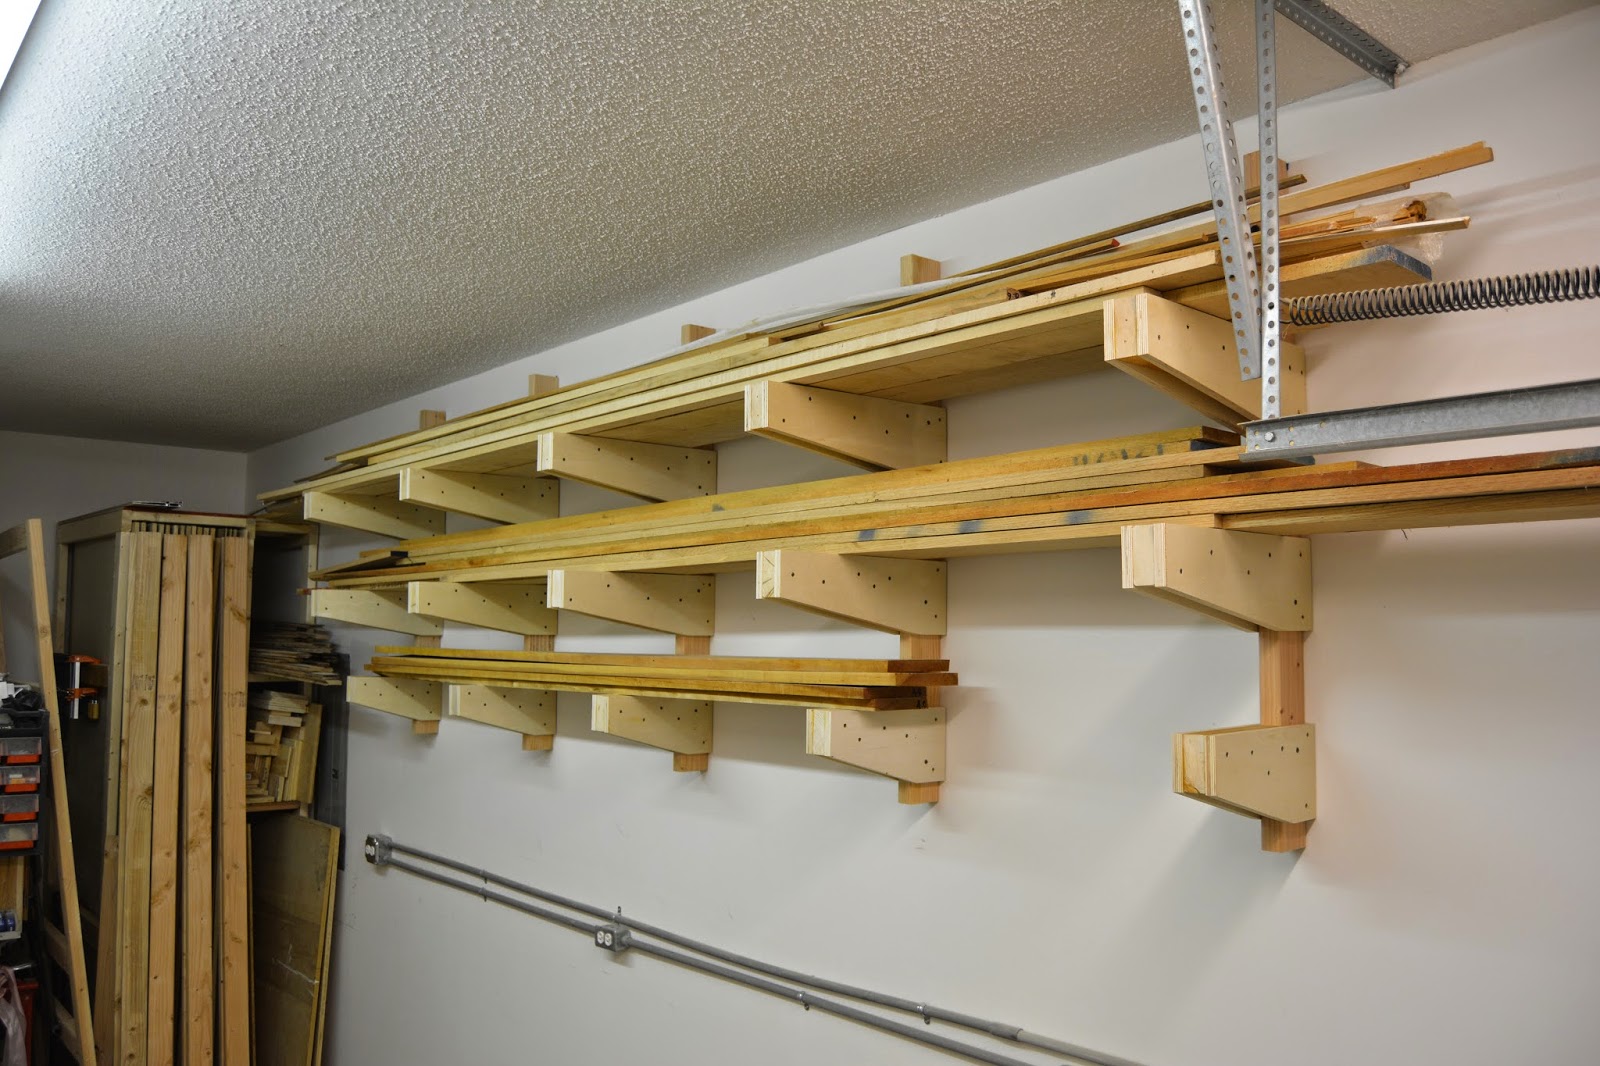
The shelf brackets are lengths of 2×4’s sandwiched in between two pieces of 3/4 plywood. I cut them at different lengths and made the bottom ones just 10″ in length as to not protrude out from the wall so much where I would be working. I used my track saw to cut the plywood lengthwise into 6″ strips and then cut them to length with my miter saw.

After making a mark 3 1/2″ from the top at the front and the bottom at the back I used a straight edge to draw a line between the two and taped them together and cut them on the bandsaw.


I used glue and screws to attach them together and used a scrap piece of 2×4 to set the depth on the plywood pieces.


Once the vertical are all attached to the wall into the studs on 32″ centers it’s time to attach the shelf brackets. I used 1 1/2″ screws on both sides and one 3″ screw on both sides to go all the way through to both pieces of plywood (maybe a little overkill).


After all the brackets are screwed into place it’s time to stack the lumber onto the rack and clean the place up.


